


These days we’ve been seeing a lot of Xiaomi Redmi. REDMI NOTE 9/S/PRO has a pretty sturdy design, chart-topping battery life, and some pretty versatile cameras for the price. The downsides are performance, the display that doesn’t get very bright and the lack of 4K video recording.
Above are the few intro features of REDMI NOTE 9/S/PRO, now let’s move towards our goal. Our goal is to learn everything about how to root REDMI NOTE 9/S/PRO.
| ADVANTAGES OF ROOTING | DISADVANTAGES OF ROOTING |
| Run special apps. Removing pre-installed apps. Freeing up memory. Increased Performance. Can Install Custom ROMs. Extend Phone Life. | Risk of “bricking” a phone. Breaks the phone contract. Your phone can get Viruses. |
WHAT TO DO BEFORE ROOTING MY REDMI NOTE 9/S/PRO?
Before rooting your REDMI NOTE 9/S/PRO, I just want to warn you that, By doing this you will loose the warranty and if you don’t read the steps and do something wrong can brick your device. That won’t happen if you follow our step by step guide carefully.
Also, before beginning we would highly recommend you to backup entire device, just to be safe. You can actually keep the data of your REDMI NOTE 9/S/PRO on your laptop. Your REDMI NOTE 9/S/PRO battery should be minimum 70%, just check it before rooting.
If your bootloader is locked then unlock your bootloader from here.
1. ROOT REDMI NOTE 9/S/PRO – MANUALLY
Step 1: Download the official ROM from here – make sure the model of your phone and the installed firmware EXACTLY match what you’re downloading. If they don’t, it may not work correctly.
Step 2: Install Magisk Manager (.apk) on your phone from the official Magisk repository.
Step 3: Extract boot.img (about 128MB) from the official ROM zip you downloaded and transfer it to the phone. Click “install” in Magisk Manager and point it to boot.img. This should result in a patched magisk_patched.img (about 15MB – padding was removed), transfer this file to your computer. Ideally to the Mi Unlock folder where fastboot.exe is located.
Step 4: Reboot your phone to fastboot recovery mode. Open a command prompt in the folder of the Mi Unlock tool and run the following code:
fastboot flash boot magisk_patched.img
Step 5: Reboot the phone and that’s it! Verify root status in the Magisk Manager app.
CREDITS - XDA DEVELOPERS
If Method 1 dosen’t work for you then only go to 2nd or 3rd Method.
Method 1 is more successful than other methods.
2. KINGOROOT
ROOT REDMI NOTE 9/S/PRO WITHOUT CONNECTING TO PC:
Step 1: Free download KingoRoot.apk on your Android.
Step 2: Install and launch KingoRoot.
Step 3: Press “One Click Root” on the main interface.
Step 4: Wait a few seconds until the result appear.
Step 5: Try a few more times for different rooting methods if failed.
Step 6: If still failed, refer to KingoRoot Android PC Version, which has a higher success rate.
ROOT REDMI NOTE 9/S/PRO WITH PC:
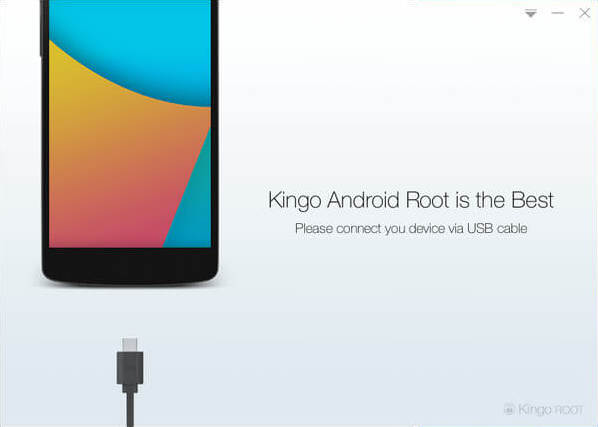
Step 1: Free download and install KingoRoot Android (PC Version).
Step 2: Double click the desktop icon of Kingo Android Root and launch it.
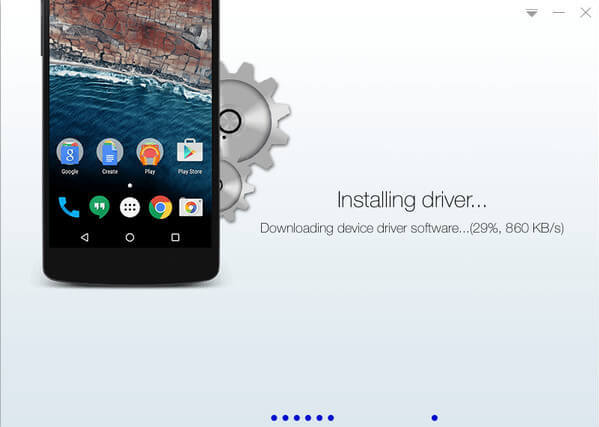
Step 3: Plug your Android device into your computer via USB cable.
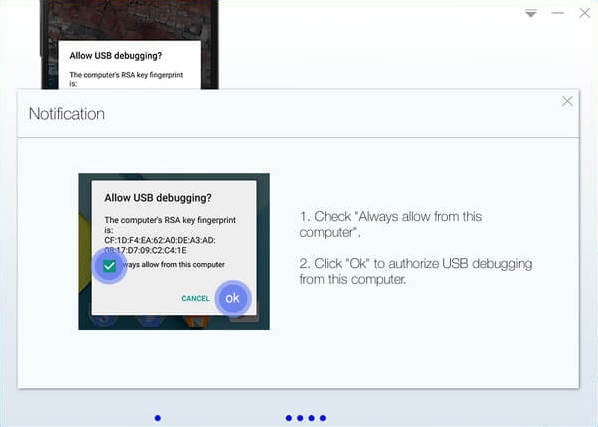
Step 4: Enable USB Debugging mode on your Android device.
Step 5: Read notifications carefully before rooting your device.
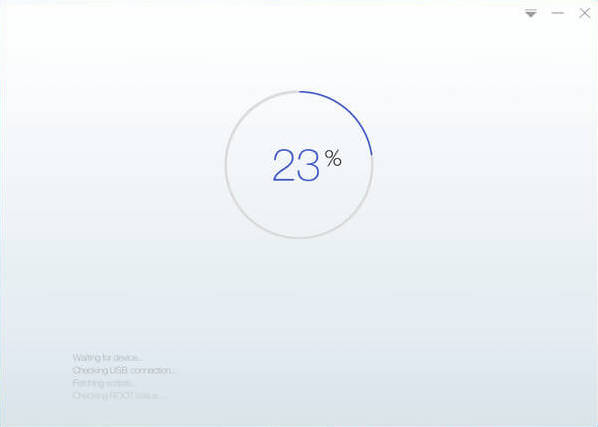
Step 6: Click “ROOT” to root your device.
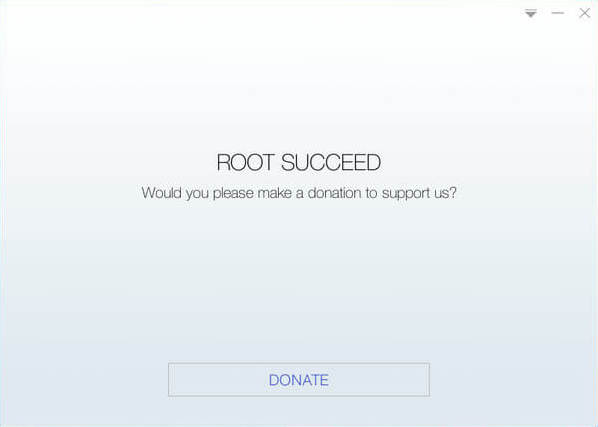
Step 7: Root succeeded.
3. ONE CLICK ROOT
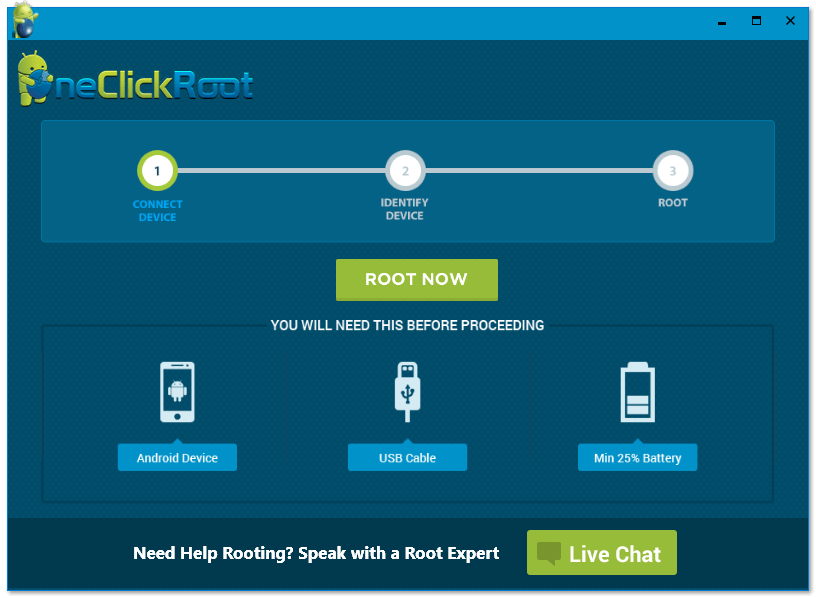
Step 1: Download and install device drivers and One Click Root from here.
Step 2: Enable USB Debugging on your device.(Go to Settings -> Developers Option -> Tick USB Debugging Option) (In case you does not find Developer options on your device, then go to Settings -> About -> Tap on build number many times. A popup will show that you are now a developer.)
Step 3: Connect your device to your computer.
Step 4: Open “One Click Root”.
Step 5: Click on Root Now.
Step 6: Wait for few seconds till our device gets rooted.
Step 7: You will find an app named SuperSu in the app drawer.
HOW TO UNROOT REDMI NOTE 9/S/PRO?
Download SuperSU from the Google Play Store. If SuperSu is already Installed then ignore this step. Open the SuperSU application, head to settings and press on Full Unroot. Restart your Android device and uninstall SuperSU application. Your REDMI NOTE 9/S/PRO will no longer be rooted.