The iPhone’s accessibility features are created to ensure that everyone, regardless of individual ability or need, can benefit the most from their iPhone.
Many people overlook the accessibility menu on their devices, despite the fact that it contains a gem of options and features that are important to take into account.
I’m going to share my favorite accessibility features and functions in this article.
1. Zoom
One of the best features of the iPhone is the ability to pinch and push to zoom in and out on the screen. This feature is especially helpful if using your iPhone is difficult for you; for example, you can zoom in on a picture to see it more closely.
Only specific areas of the iOS user interface are supported by this. Text, for instance, or images, but not all. The Magnify Content feature may be useful if you frequently need to zoom in on iOS areas where doing so isn’t usually supported.
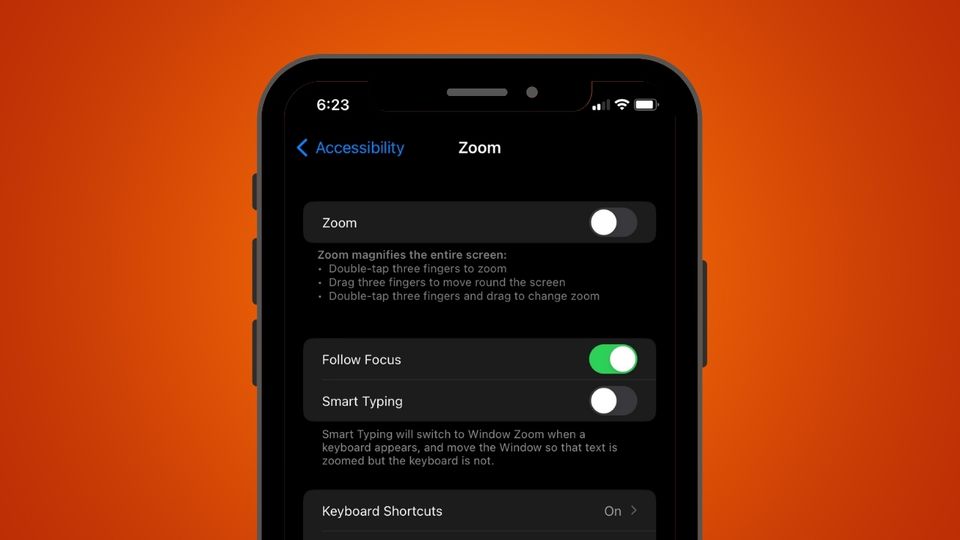
- Open Settings
- Tap on Accessibility and then Zoom
- Now just Enable the Zoom with Toggle Button
- Double-tap on Screen With three fingers to enable the zoom
- Double-tap with three fingers again to remove the zoom
2. Sound Recognition
The majority of the people I speak with have no idea what this accessibility feature is, but it feels magical nonetheless. Your phone can be set up to listen out for particular sounds, just like your iPhone can be set up to constantly look for its voice assistant trigger phrase, “Hey Siri.”
The microphones on the iPhone are incredibly powerful and can pick up sounds that you might find challenging to hear yourself. A baby crying, a doorbell ringing, a dog barking, glass breaking, etc. Your iPhone is capable of identifying and alerting you to a wide variety of sounds.
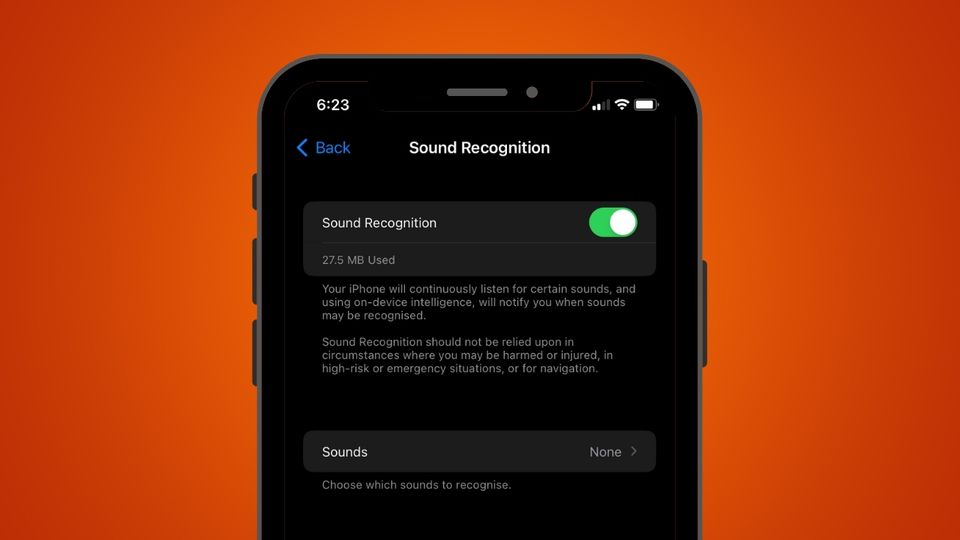
- Head into Settings
- Tap on Accessibility
- Then on Sound Recognition and Toggle it ON.
For this, your phone will download a few files, but they are only a small size. Then, you can pick which sounds you’d like your phone to keep an ear out for. If you’d like, you can even select a unique tone for each sound.
3. Reachability
If you have an iPhone Max model, you are, all things considered, using a pretty sizable iPhone, especially when you consider that the upcoming iPhone 14 apparently has two Max models in the range. Even the larger iPhone 13 Pro is quite large, especially if your hands are small.
The back button on most apps is typically found at the top of the screen, so if you’re holding your iPhone in one hand, you’ll frequently need to move your thumb there. Stretching like that is very uncomfortable. To help with this, however, you can enable the Reachability accessibility feature.
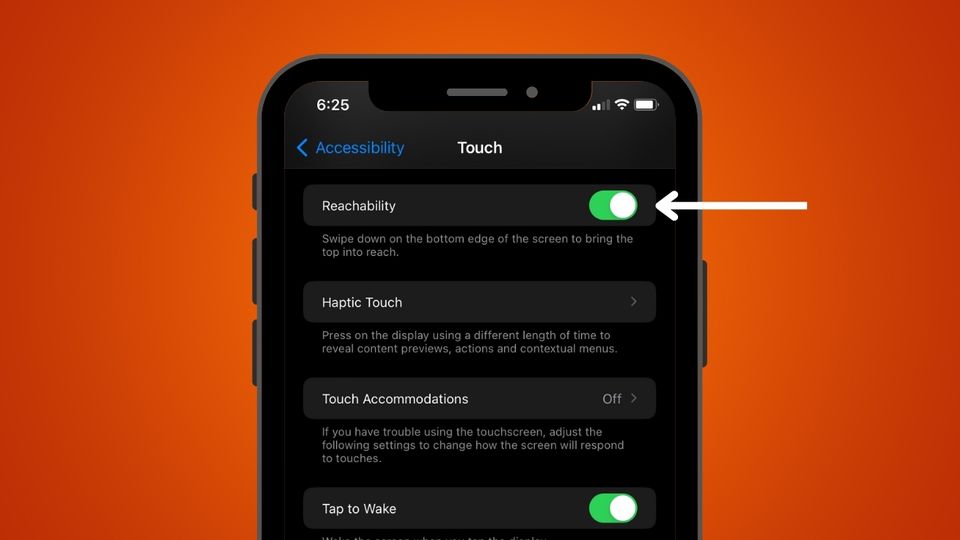
- Open Settings
- Click on Accessibility and then on Touch
- And make sure that Reachability is toggled ON
You must now make a small downward swipe gesture on the bottom of your screen for this to work. It takes some practice to get this to work, but once you get the hang of it, it becomes muscle memory. If you use your phone one-handed but find it difficult to reach the top of the screen, this can be a game-changer.
4. Backtap
This is the most well-known accessibility feature available, and for good reason—it makes excellent use of the iPhone’s touch sensitivity and opens up possibilities that I believe the majority of users will find useful. In essence, you can program your iPhone to activate a function in response to a double or triple tap on the phone’s back.
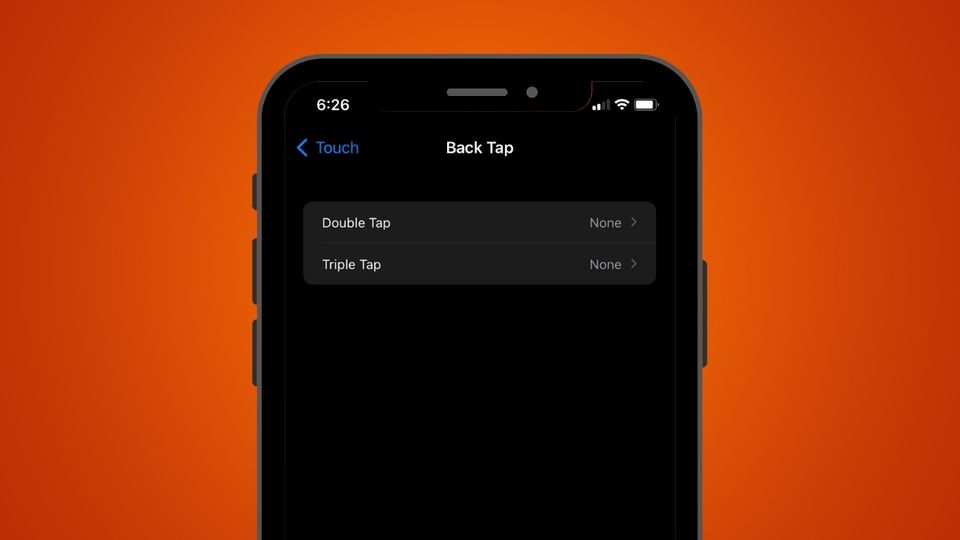
- Go to Settings
- Tap on Accessibility and then on Touch
- Scroll down and Open Back Tap
- When you select task, it will automatically turned on
You can set this to be activated by either a double or triple tap on the phone’s back. My advice is to experiment to see which method is most effective for you.
5. Guided Access
The ability to lock your phone into a particular app is a less well-known accessibility feature. People either aren’t aware of this option or have looked at it but decided it was too difficult to use. However, as I’ll now demonstrate, it really isn’t.
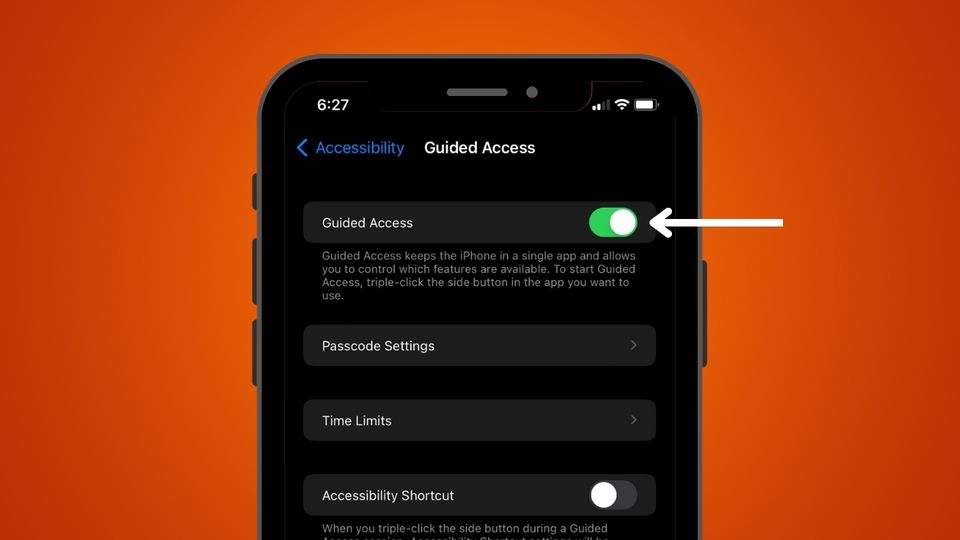
- Open Settings
- Tap Accessibility
- Turn on Guided Access
You can usually enable features like Touch ID or Face ID if your phone has those options under Passcode Settings, or you can input a PIN that you’ll use to enable and disable this feature. Obviously, this pin should be one that only you know.
Scroll down and enable Accessibility Shortcut after that. It states that three taps on the side button will activate guided access.
For Example, I am going to open a game on my phone, and with the game open, I’m going to triple tap the side button and choose Guided Access. Now Down here at the bottom left, we’ve got some options. I can choose whether to enable or disable any of the following:
- Side button
- Volume Button
- Motion
- Keyboards
- Touch
- Time limit
Now I’m then going to press Start up at the top right, and input the PIN I’d like to use.
When giving your phone to a child or someone you don’t want to be able to access things outside of the game or app that you’ve set them up in, this would be a great tool to know.
Once finished, triple-tap the side button, enter your PIN, and then select End. Now, the phone switches back to regular mode.
6. AssistiveTouch
Swiping down from the top of the screen to access control center, for instance, allows you to access a wealth of useful iPhone features. The iPhone makes excellent use of swipe-based gestures. Assistive Touch is a great option if you’re one of the people who finds the reliance on swiping to be difficult.
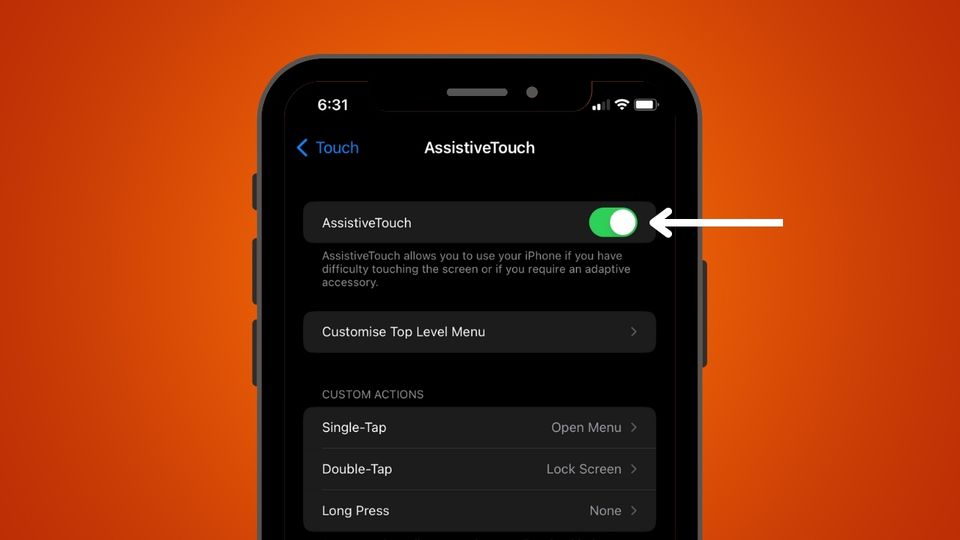
- Go to Settings → Accessibility → Touch
- Now Toggle Assistive Touch on
This tiny button will show up near the bottom of your screen, and you can move it around by pressing and holding it while dragging it in the direction you need. This button is a smart button that is always visible on your screen and that you can customize to give you access to just about anything you require.
For example, if I tap on Assistive Touch, you can see that I’ve got quick access to the notification center, I can take a screenshot, I can access Siri, I can go to the Home Screen, I can access the Control Center, and I’ve got some device related functions here. Pressing on that, I can lock the screen, change the volume, unmute the device, rotate the screen, and if I tap into More, there’s even more functions, like the ability to restart the phone or access Apple Pay. The Back arrow will take you back.
Now you can customise this according to needs. From where you enabled Assistive Touch, on that page you will see some options to customise Assistive Touch.
7. Live Listen
You can enable a feature called Live Listen if you have a pair of AirPods and an iPhone. Here, your iPhone essentially transforms into a handheld microphone that transmits to your AirPods.
For example, you’re out for a meal in a noisy restaurant, and you’re struggling to hear the person you’re with, you could position your iPhone close to them, and use the AirPods to allow you to better heat what they’re saying. It’s no replacement for dedicated listening aids of course, but it’s a good feature to have.
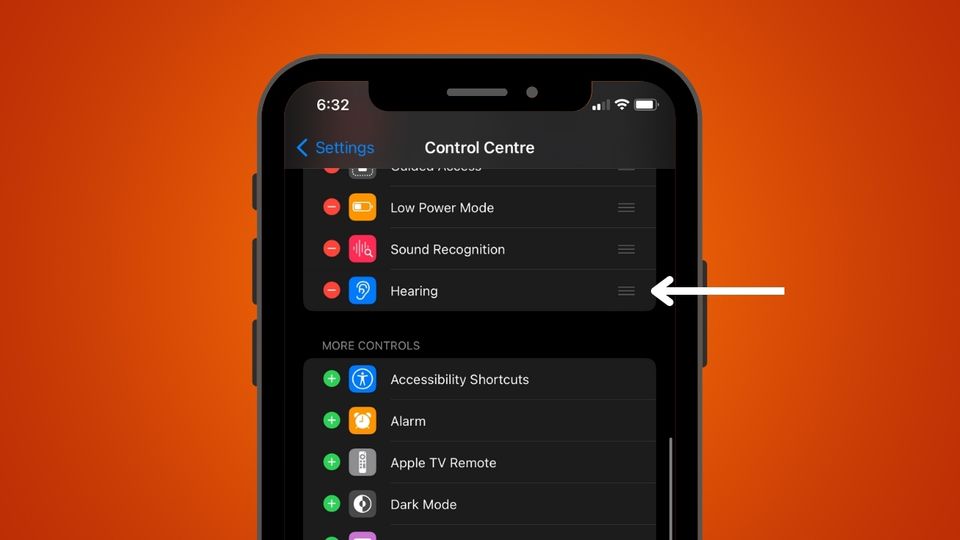
- Head to Settings, then Control Center
- Ensure that Hearing has been selected
- If it’s not in this menu, scroll down and press Green Plus icon to
add it.
Open Control Centre, tap the Hearing icon, and then turn on Live Listen while still wearing your AirPods. The iPhone’s microphone should then allow you to hear.
8. Type to Siri
Although it may not be as capable as its rivals, Siri is a very capable voice assistant that keeps getting better. You probably already know how to activate it and use it to accomplish a variety of tasks on your phone.
However, some people find it difficult to communicate with Siri, so if that describes you, you might prefer the option of typing your requests to Siri. In this way, you could type “weather tomorrow” instead of asking something like “what’s the weather going to be like tomorrow” and get the same answer.
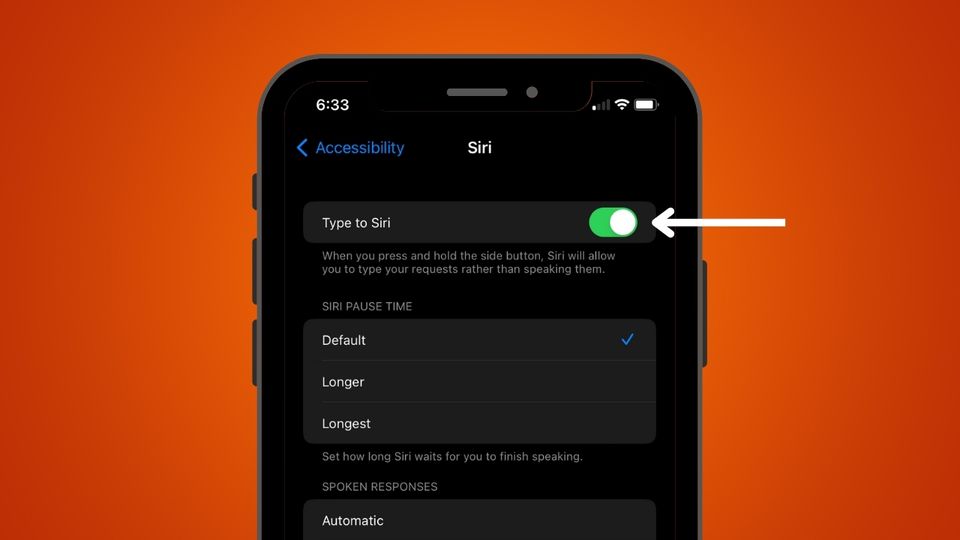
- Go to Settings → Accessibility → Siri
- Now enable ‘type to Siri’
When you press and hold the side button, Siri will stop waiting for you to speak and start typing in the text box.
