
In this article, I will explain how to root your Galaxy S10, S10+ Or S10e with magisk. This root method only works for Exynos models.
You can even Root you Android 10 version with this method.
Here are the models supported:
- Samsung Galaxy S10 – SM-G973F, SM-G973N, SM-G973F-DS
- Samsung Galaxy S10e – SM-G970F, SM-G970N, SM-G970F-DS
- Samsung Galaxy S10 Plus – SM-G975F, SM-G975N, SM-G975F-DS
Models not supported:
- Samsung Galaxy S10 – SM-G973U
- Samsung Galaxy S10e – SM-G970U
- Samsung Galaxy S10 – SM-G975U
Notice
Rooting will also disable your Samsung Pay and S-Health.
Steps To Root Samsung Galaxy S10, S10+ Or S10e Using Magisk App
Step 1. Go to Settings>About phone>Software Information.
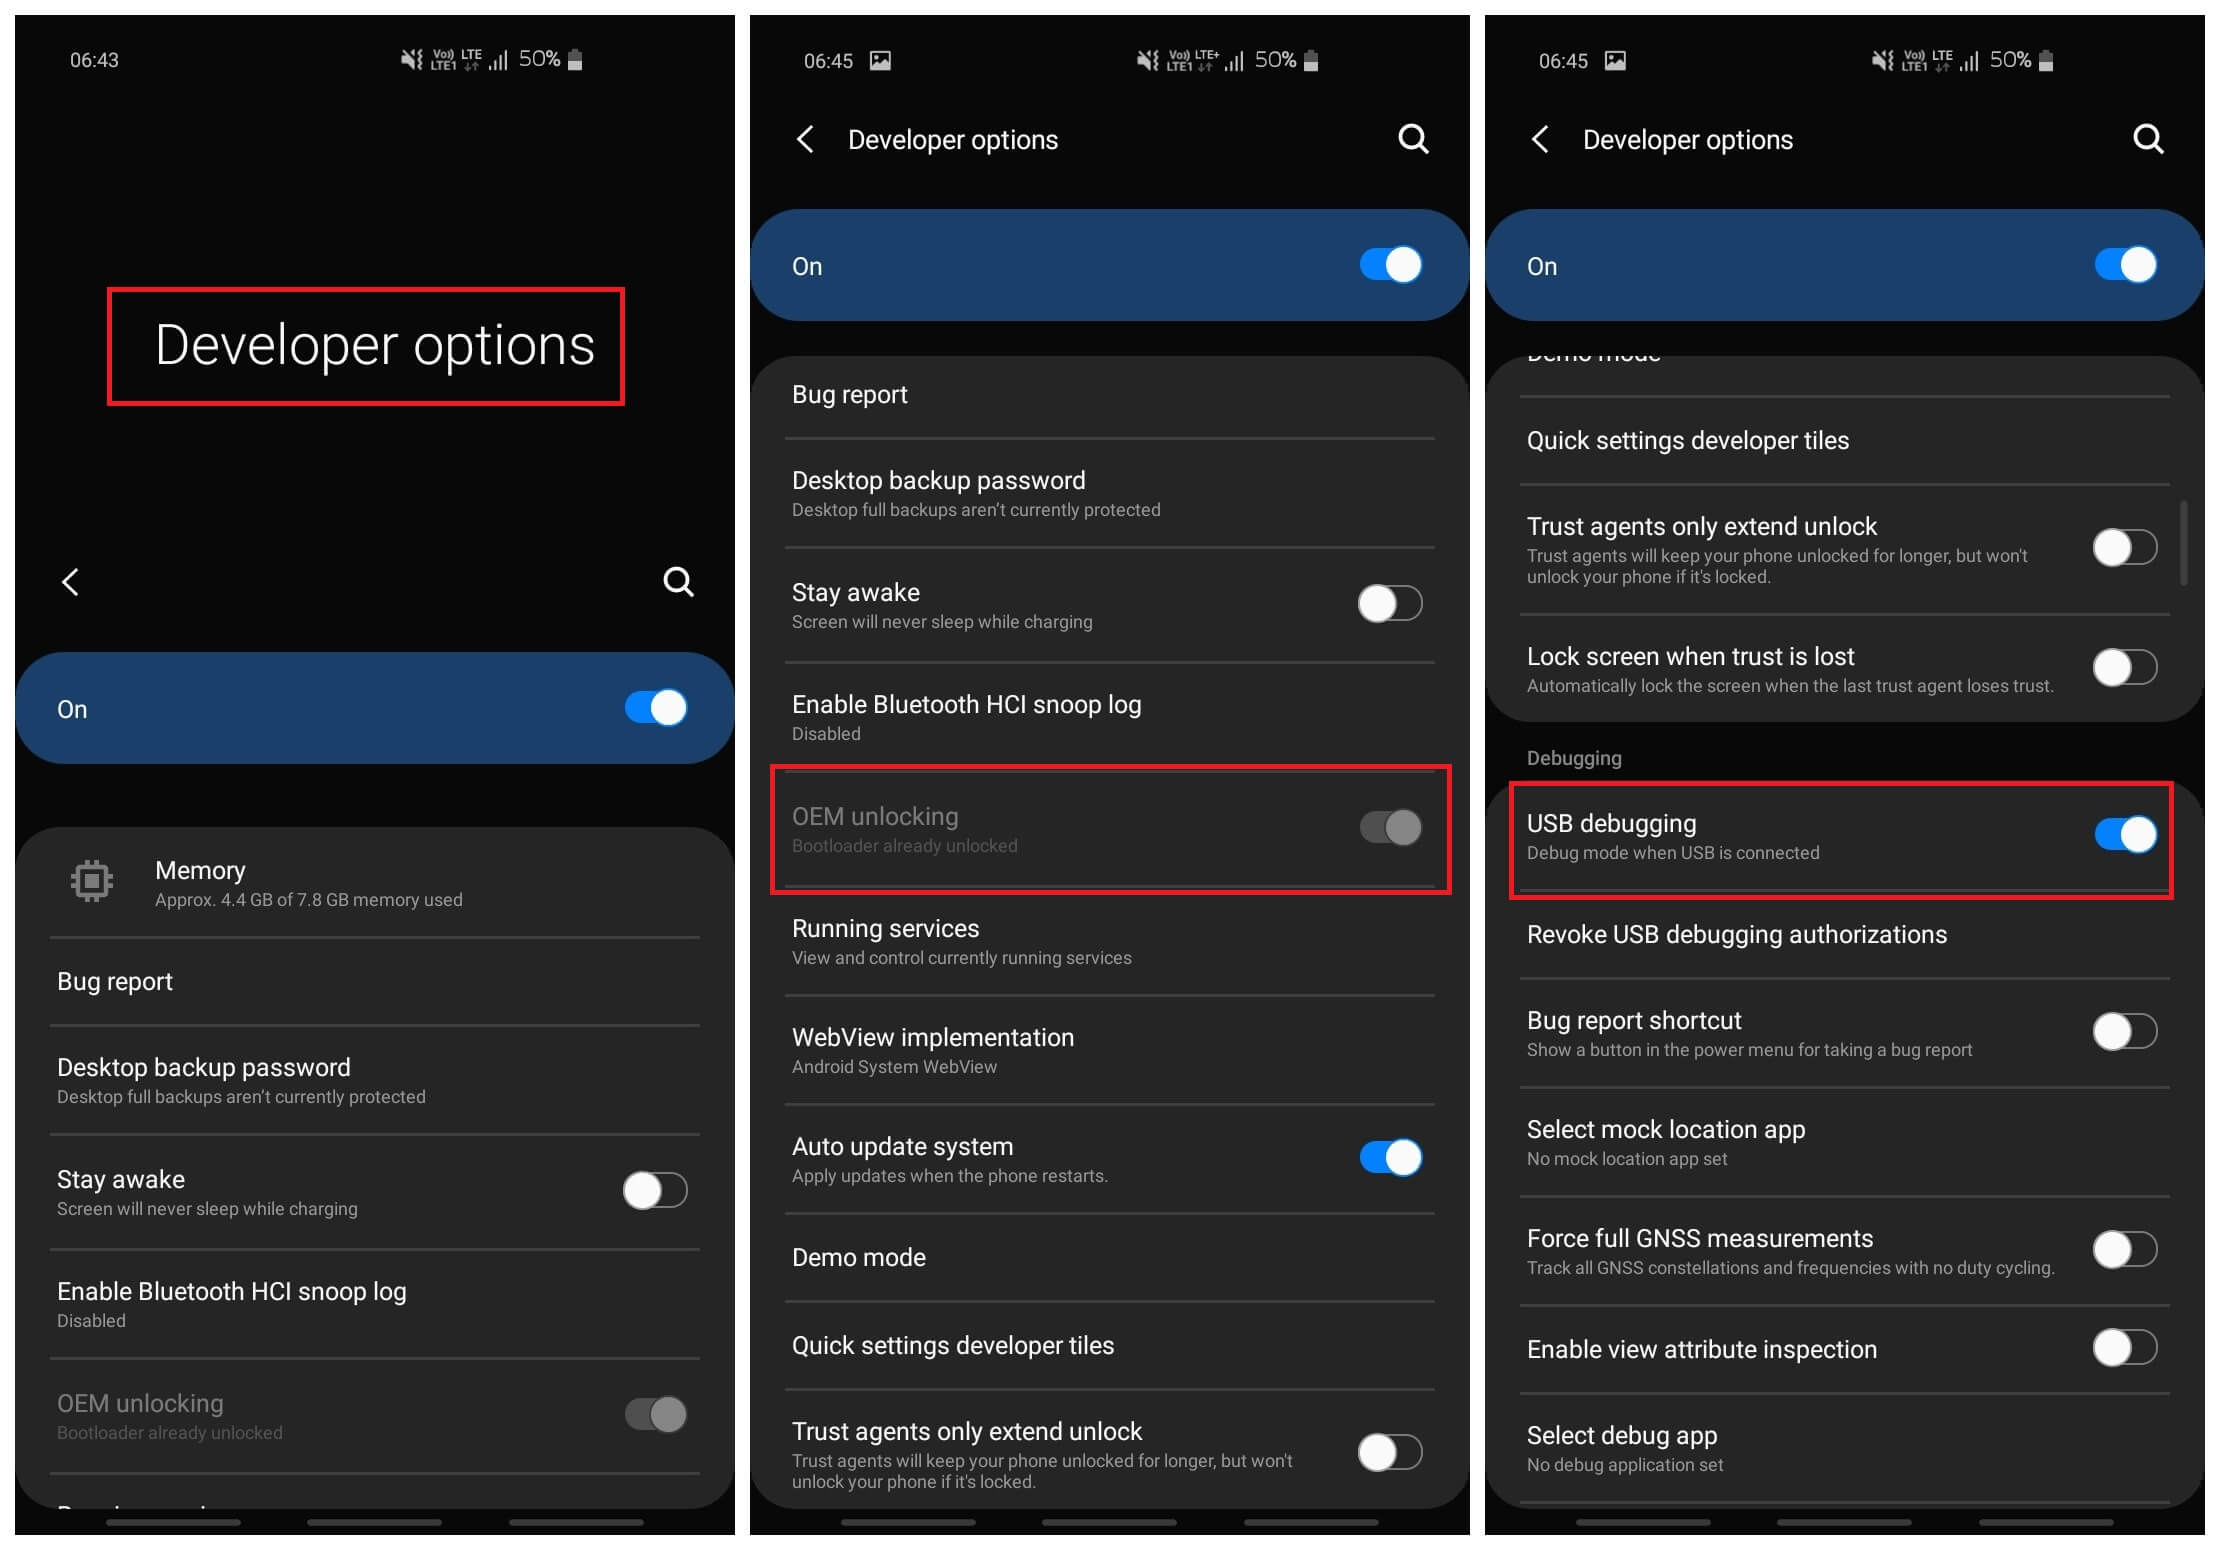
Step 2. Tap on “Build Number” for 5 times and then it will say “Developer Mode Has Been Turned On”. You will see the “Developer Options” in the “Settings”
Step 3. Now open the “Developer Options”. Turn On the “OEM Unlocking” and “USB Debugging”.
Step 4. Power Off Your Device.
Step 5. Now Hold down “Volume Down” and “Bixby” buttons together and connect it using a USB cable to your PC. Now you are in the “Warning” Mode.
Step 7. Hold down the “Volume Up” button and then it will ask you to “Unlock Bootloader”. Now hit “Volume Up” button to unlock the bootloader. This Step will fully unlock your ‘BootLoader’. Now your device will be automatically factory resetted and rebooted.
Step 8. Once it is completely booted up, check “OEM unlocking” has been greyed out and turned ON. If it is greyed out like in the above image, then you can proceed to next step.
Step 9. Download the Canary version of Magisk Manager APK here. Install the app after downloading.
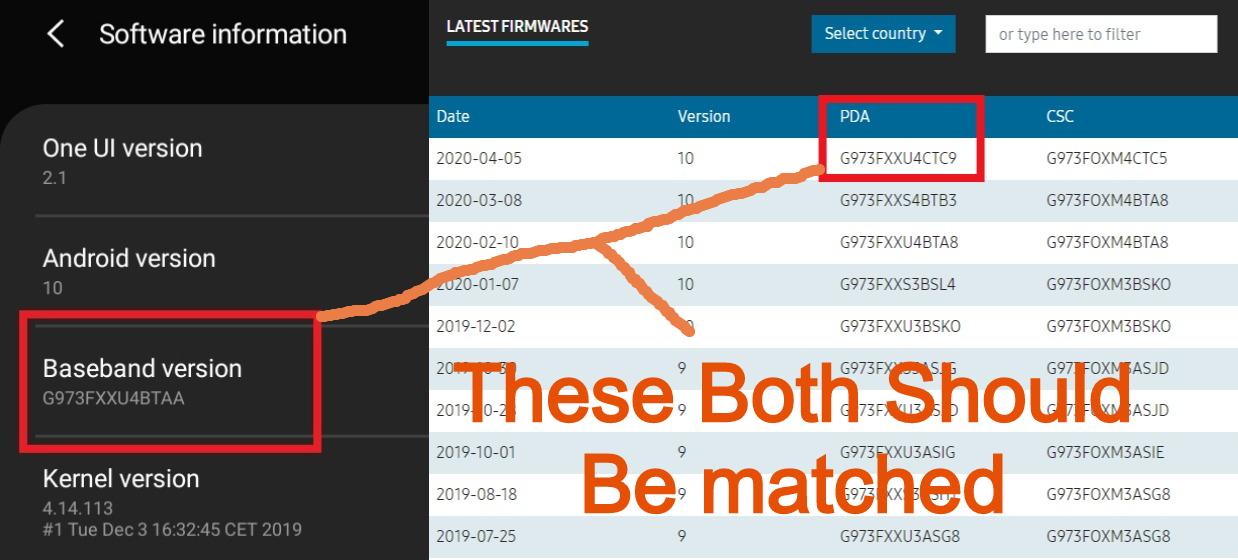
Step 10. In this step, you have to download the Official Firmware of your device. So go to SamMobile.com and download the firmware. Now when you are downloading the firmware, your “Baseband Version” should be the same. If your “Baseband Version” is not the same, you won’t able to root. To check the “Baseband Version” of your device, go to “Settings>About phone>Software Information” and there you will see “Baseband Version”
Step 11. Also, download ODIN and Samsung USB drivers here.
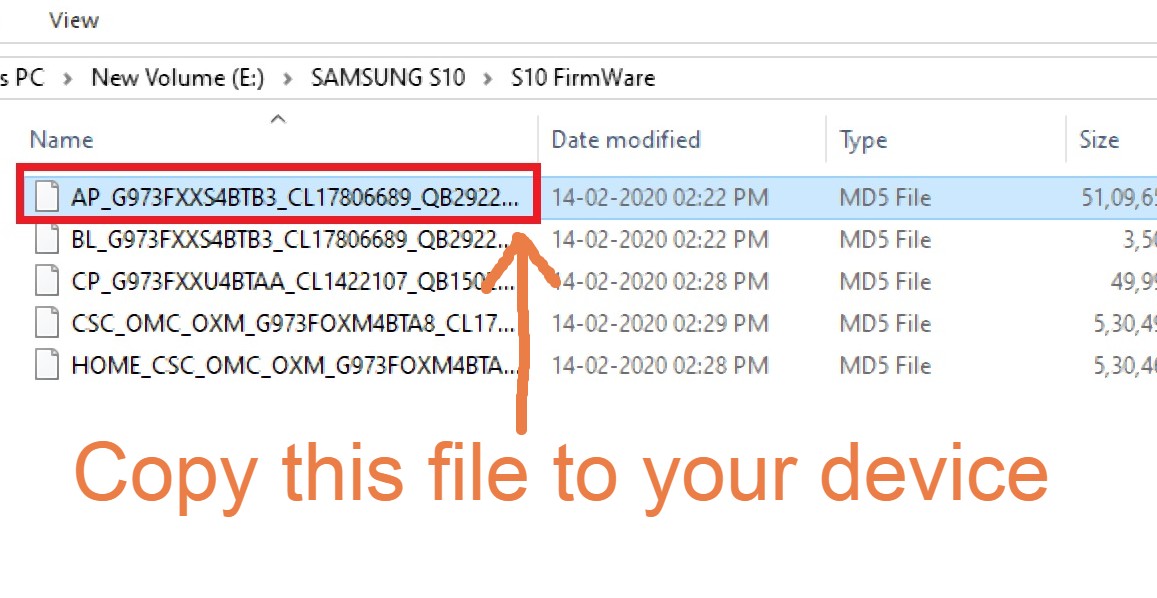
Step 12. Extract the downloaded firmware and copy the “AP” file to your to your phone’s storage.
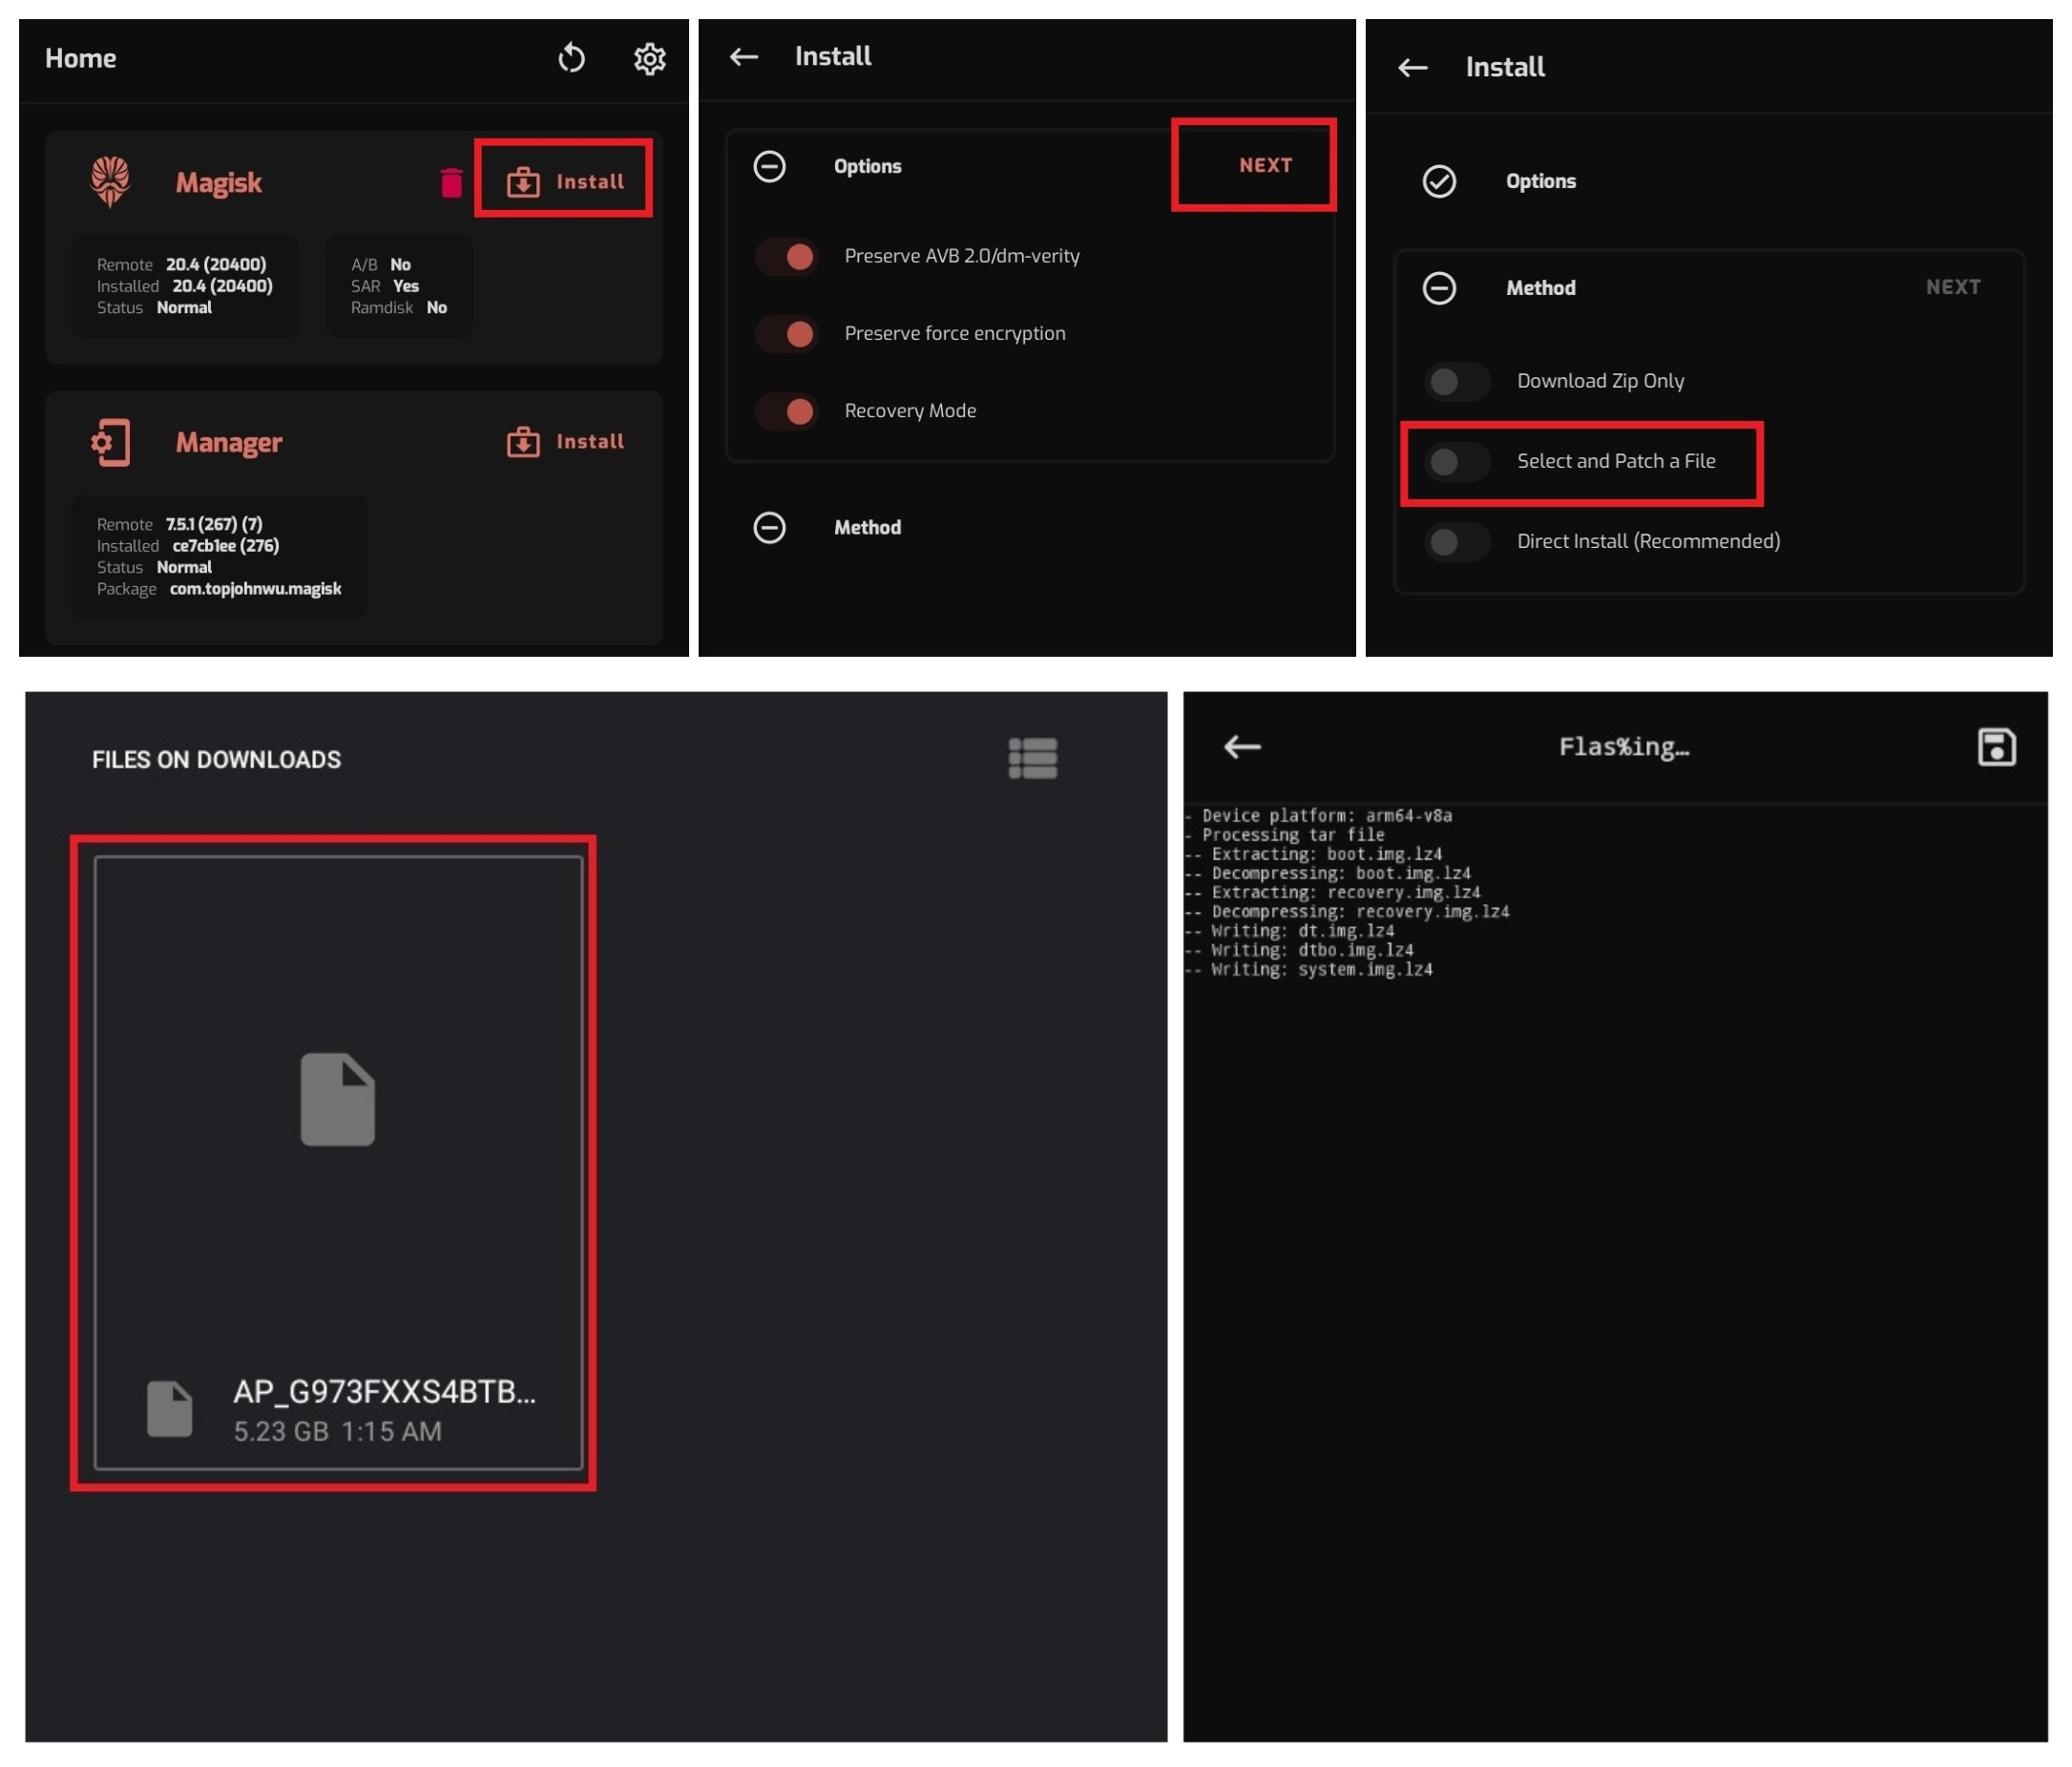
Step 13. Once the file is copied, go back to your mobile and open “Magisk Manager” and tap on the “Install” button where it says “Magisk is not installed”. Then tap on “Select and patch a file” and choose the “AP” file that you have copied earlier. “Magisk Manager” app will patch the “AP” file in about 5 minutes.
Step 14. Once the patching is done, connect your device with PC and copy the patched file “magisk_patched.tar” from ‘[Internal Storage]/Download/’ to your PC.
Step 15. Unplug the cable from PC and power off the device. Now hold the “Volume Down” and “Bixby” button together and connect it using a USB cable to your PC, like you did in “Step 5”.
Step 16. Again you are in “Warning” Mode and in this step you have to press the “Volume Up” button to enter the “ODIN Download Mode”.
Step 17. It’s time to install “Samsung USB Drivers” which you downloaded earlier.
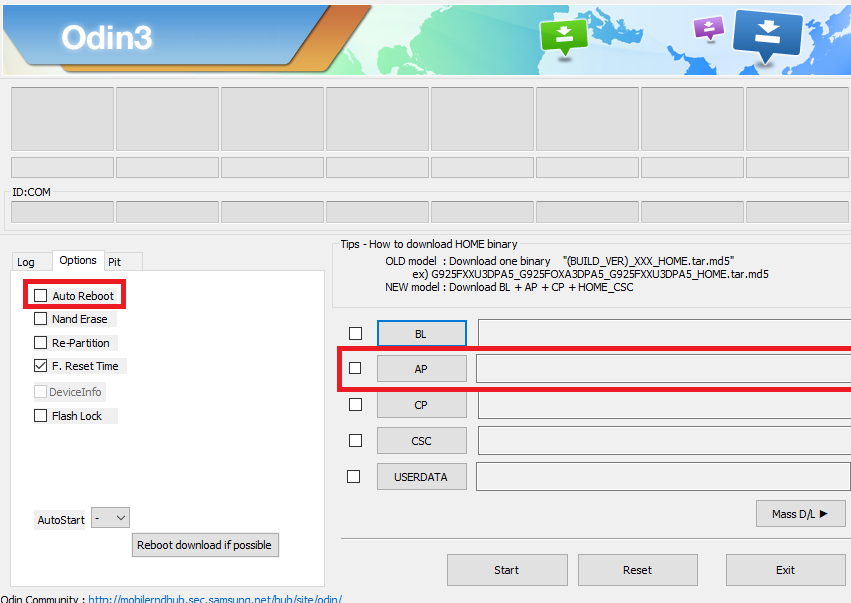
Step 18. Now extract the “Odin.zip” and run the “Odin.exe”. Then click on “AP” and select the “magisk_patched.tar” file which you have copied from your device. Also go to the “Options” and make sure that “Auto Reboot” is turned off, this will allow your phone to not reboot after flashing is done.
Step 19. Go ahead click the “Start” button and this will flash the ROOT PATCHED SYSTEM which is the new way to root Samsung S10, S10+ Or S10e. Once you see “PASS” on “ODIN” then you are ready to go on next step.
Step 20. Now in this step, you have to enter in the “Recovery Mode”. For that first press “Power” and “Vol Down” buttons to exit “ODIN download mode”. Now as soon as the phone display turns off, press and hold the “Power” + “Bixby” + “Vol Up” buttons at the same time. Now when you see your phone’s model on the screen just release all the buttons except the “Vol Up”. If you miss this step, then you have flash “magisk_patched.tar” again.
Step 21. Now you are in the “Stock Recovery” and select “wipe data/factory reset” using “Volume keys” and hit “Power Button”. Then hit the Power key to reboot. Congratulations, you have fully rooted your Galaxy S10/S10e/S10 Plus.
Booting into the Rooted System
After “Step 21” you will be booted in “Unrooted System”. This is because the root and stock recovery co-exist in the same partition. This means that you can boot into the rooted system, as well as unrooted system. And there is a simple process to go into “Rooted System”.
NOTE: These steps are only to be used when the phone is completely switched off.
• BOOTING INTO UNROOTED SYSTEM: Turn on your phone as you normally would using the power button.
• BOOTING INTO ROOTED SYSTEM: Press and hold the Power, Bixby, and Volume Up, buttons together and let go off them once the Bootloader Warning screen appears. You will be booted into the rooted system.
Also Read: How to Install Custom ROM on Samsung Galaxy S10 Without TWRP
HOPE THIS TUTORIAL REALLY HELPED YOU. IF YOU HAVE ANY ISSUES OR QUERIES THEN DROP A COMMENT.