While changing the phone or changing some settings on your iPhone, it is always better to backup all your data and information so that they do not get deleted or wiped out once you restart your phone, and you have all the necessary documents as it was. Backup of your data is a process by which you create and store everything which is in your iPhone as a copied version, which is protected and does not get lost while you are resetting your iPhone or changing everything to a new iPhone. Backup is also known as operational recovery. Once you have all your required files and folders or pictures backed up, once you restart your iPhone, all the backup will get back to its original folders and files, and none of your documents or data will be lost in the process. It is essential and important to create a backup of all your information on your iPhone.
You should always backup at a regular period so that it takes less time since backing up all the information at the last moment will take up a lot of time. A person can’t back up their iPhone information to a computer that has iTunes or iCloud as the user might be in a place or might have access to a computer or the laptop to connect his or her iPhone at that moment.
So this article will give you detailed steps as to how to back up your iPhone without iTunes or iCloud.
Steps to Back up an iPhone without iTunes or iCloud
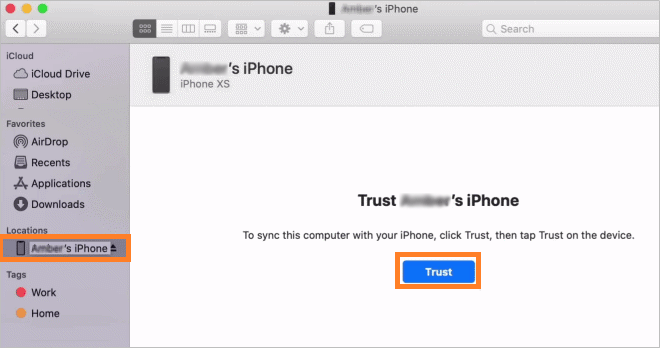
Step 1: Plug your iPhone into your Mac. Then, open the Finder window. Here you will see your iPhone in the “Location” section. Select your device from the sidebar.
Step 2: Trust your device connection.
If this is your first time connecting your device and your Mac, click Trust.
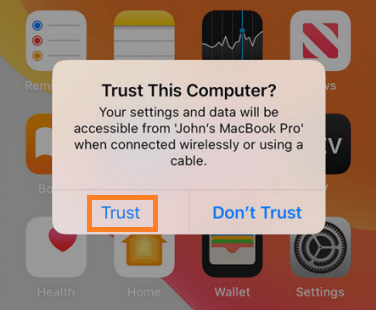
Then click “Trust” on the device when prompted, and enter the device passcode to confirm this connection.
Step 3: Back up iPhone to computer. To back up your iPhone, go to the “Backup” section and switch to the “Back up all data on your iPhone to this Mac” option.
Step 4: Encrypt iPhone backup. If you want to back up sensitive information (such as passwords, personal health or activity data), you need to create an encrypted backup, simply click the box next to “Encrypt local backup“.
Step 5: Then enter the password, then click Set Password.
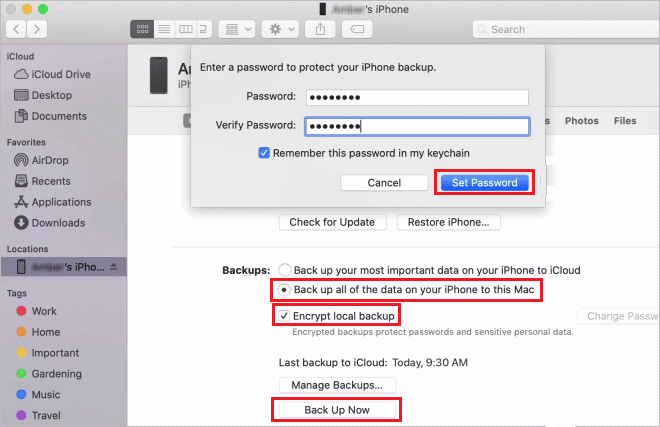
Step 6: If you have set up an encrypted backup, click Backup Now. This backup will be stored on your local Mac.
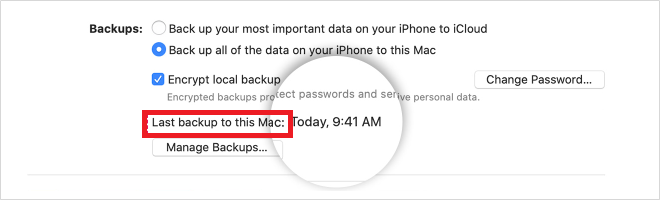
Step 7: When the process ends, you can see if the backup finished successfully on the “Last backup to this Mac” section.
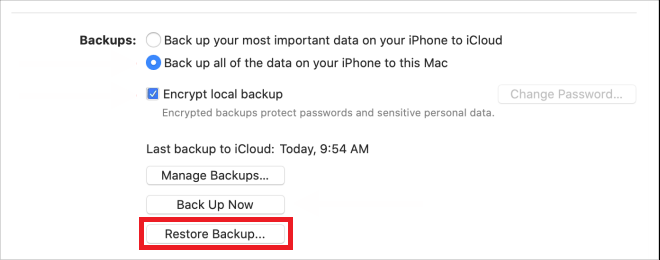
Step 8: If you want to restore the old backup on your iPhone or iPad, click the “Restore Backup” button.
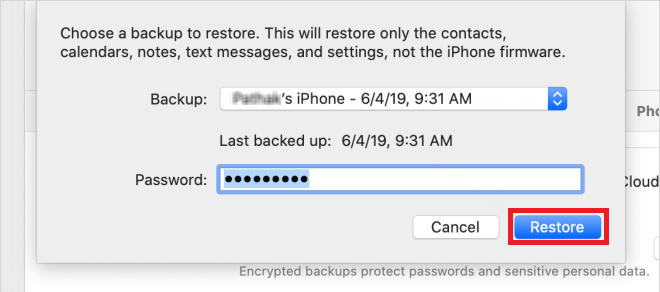
Step 9: From the pop-up window, select the backup to restore. If your backup is encrypted, you’ll be prompted to enter or confirm your password. Click the “Restore” button to start the process.
Step 10: As your device restores to this backup, it will reboot. Be sure to keep your device plugged in until after it restarts and waits for it to sync.